Translate

Thursday, May 25, 2006

Lesson I Part II- The Basic Diamond: Interlacing

Mastering the Basic Diamond - the interlacing


The next step is filling or interlacing the foundation or the skeleton.

Note: I will be using the terms filling and interlacing interchangeably. So too the terms foundation and skeleton.

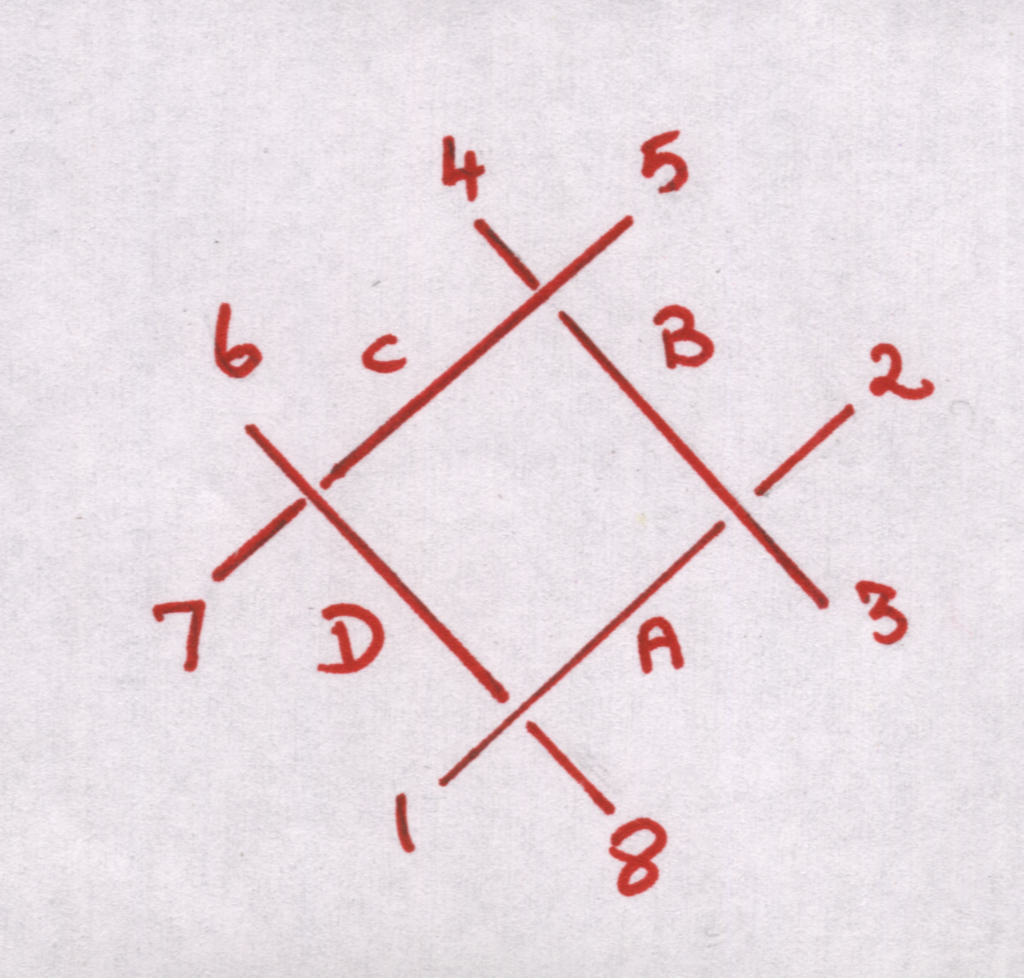
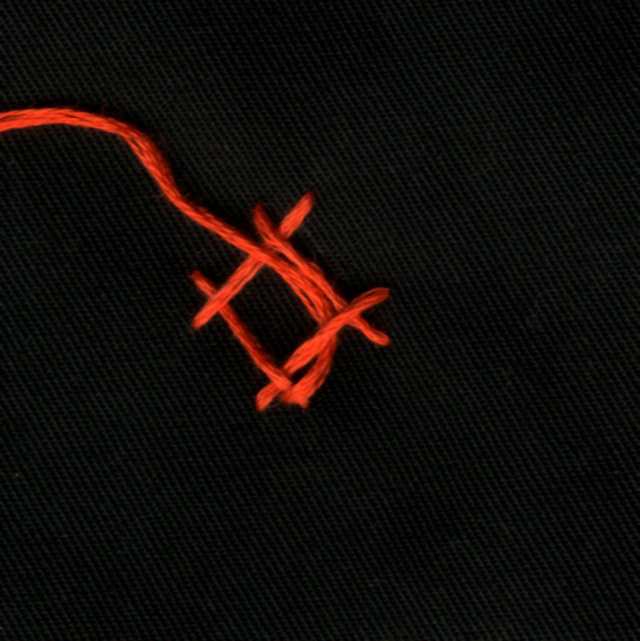
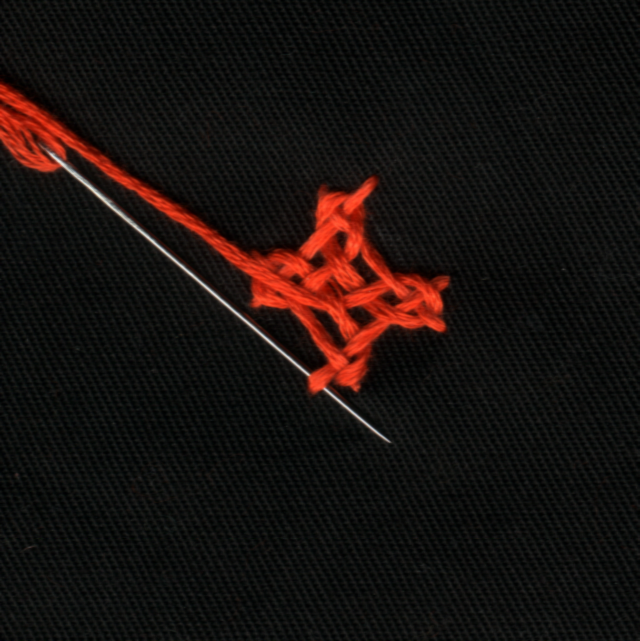
Bring the needle up between 1 and 8 as in the picture.
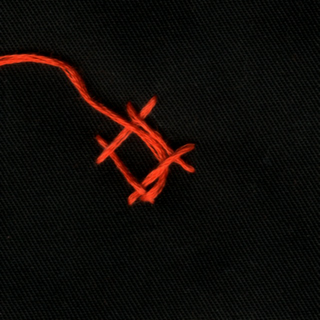


Pass the needle
over 1 and under D
over B and under 2 = Line A1 is formed
over 3 and under A = goes around corner.


Over C and under 4 = Line B1 formed
Over 5 and under B = goes around the next corner.

Over B1

Over D and under 6 = Line C1 is formed
Over 7 and under C = goes around the next corner


Over C1 and under A1
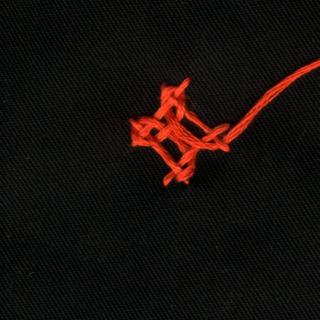
Over A and under 8 = back to the starting point wherein the needle is inserted back into the fabric.

Points to remember:
1. Except at the starting point and at the end, the needle is only passed under or over previously laid thread.
2. You can count upto 4 parallel lines in any direction in this motif. Observe that if the odd numbered threads are under line A, then the even numbered threads are over line A and vice versa. The same is true for lines B, C and D also.

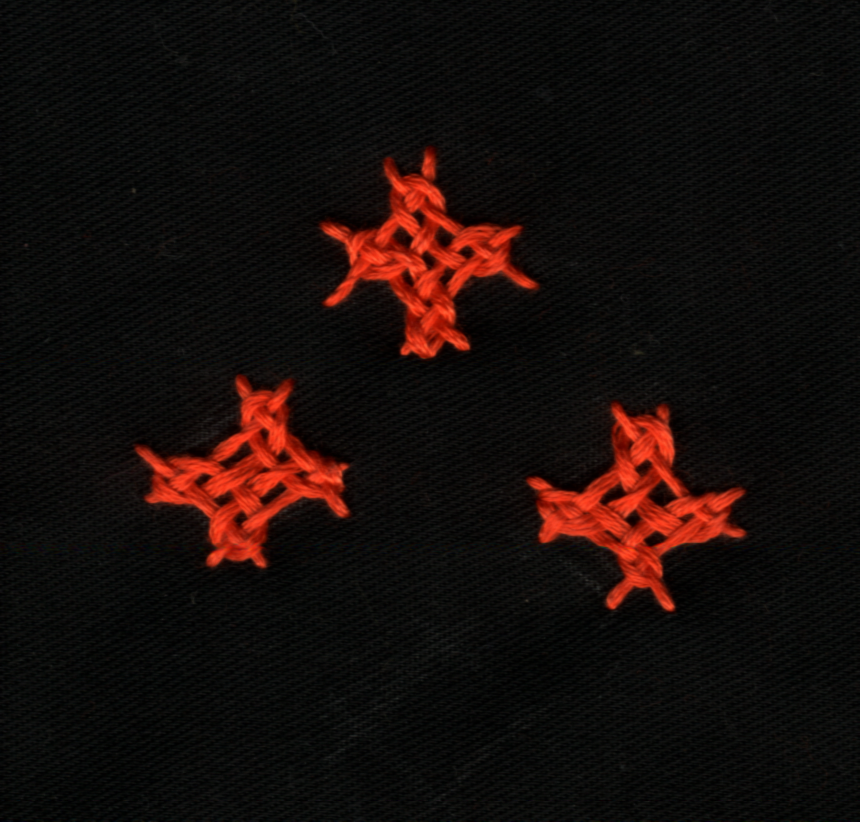
This again is a very important step. It should be perfected before moving on to the Maltese Cross.

Thursday, May 18, 2006

Lesson I Part I: The Basic Diamond : Skeleton

Use a frame for the embroidery. The fabric should not be stretched tightly - it will lead to pluckering of embroidery when the frame is removed. The fabric should not sag within the frame either.

Mastering the Basic Diamond - Foundation

Lines A, B, C and D form the basic square or diamond depending on how it is drawn.


Points 1 and 2 are extensions of the line A at the two ends of line A.
Points 3 and 4 are extensions of the line A at the two ends of line B.
Points 5 and 6 are extensions of the line A at the two ends of line C.
Points 7 and 8 are extensions of the line A at the two ends of line D.

Bring the needle up at 1
Take it down at 2

Bring it up at 3
Take it down at 4


Up at 5
Down at 6

Up at 7
At this point, pass the needle under line A and down at 8.

The skeleton or the foundation for the basic diamond is now complete.


PLEASE NOTE THAT THERE IS AN ERROR IN THE FIG ABOVE - 6 AND 7 SHOULD BE INTERCHANGED Thank you Manjeri for pointing it out.


The pictures show pictorial representation and the Basic Diamondworked on fabric.

Did you notice that…

One end of A is over D and the other under B
One end of B is over A and the other under C
One end of C is over B and the other under D
One end of D is over C and the other under A

Understanding this alternating sequence of overs and unders is the secret behind successful working of Kutchwork.

It is essential to understand and master this concept before proceeding to the next step.

Thursday, May 11, 2006

Kutchwork Embroidery - Basic Motifs


The Single Diamond -  is the simplest motif used in Kutchwork.


The next motif is the Maltese Cross...


followed by the interlacing stitch in a shade of pink.  The motif in red is a combination of 2 lines of interlacing joined together by a Maltese Cross.


The Picture below is a combination of 4 Maltese Cross motifs joining to form a single more intricate and interesting motif.


The design possibilities using these simple motifs are limitless.
The picture below is one such combination of the 4 motifs PLUS a mirror in the center. I could get in only 3/4 th of the embroidered piece as I scanned the embroidery directly instead of photographing it. I am sure you can imagine what the full piece would look like.


Kutchwork – An Introduction
Lesson I Part I
Lesson I Part II
Lesson II Part I
Lesson II Part II
Lesson III
Lesson IV

Tuesday, May 09, 2006

Kutchwork - An Introduction

I have just completed a small Kutchwork sampler in shades of red and pink for my Kutchwork summer class. I have stitched a mirror in the center.

I have not decided whether to use a delicate tatted lace as edging to compliment the bright filled in motifs or a crochet lace worked in pearl cotton.

Update: I decided on a crochet lace because it was quicker.


In India, with her rich and varied culture and traditions – craft flourished thanks to royal patronage. Embroidery in the different regions of India, is as rich, distinctive, varied and colourful as the people inhabiting them.

The embroidery of Kutch and its neighbouring Saurashta is probably the most colourful and eye-catching. It flourished in the late 19th and 20th centuries. It employs simple stitches like the herringbone, buttonhole, chain and open chain stitches. The interlacing stitch (looping around the double herringbone stitch) and the Maltese Cross stitch are predominant. The work is embellished with mirrors and sometimes even shells.

Geometric motifs are built using the Maltese Cross and Interlacing stitch. A truly amazing combination patterns are churned out using just these. Once the basic “overs” and “unders” of the interlacing are mastered, even a beginner can execute a seemingly complicated pattern, with relative ease.

Now, here is the interesting part – The Maltese cross and the Interlacing stitch are also predominantly used in Armenian Embroidery.There are very clear instructions for drawing the motifs and interlacing in their website.

Armenia, is a small pocket north east of Turkey.

Some researchers believe that the interlacing stitch was brought to the Kutch region by Arab traders – that the stitches were characteristic of traditional Sindhi embroidery (Kutchwork) practiced widely by immigrants from Sind and Baluchistan (western Pakistan).

Maybe the stitches originated in the Arab nations of Iraq and Iran, spread upwards to Armenia and downwards to the Sind region and to Kutch region in India.

This is a Sofa-back I embroidered using the interlacing stitch, the Maltese Cross stitch, satin stitch and stem stitch.