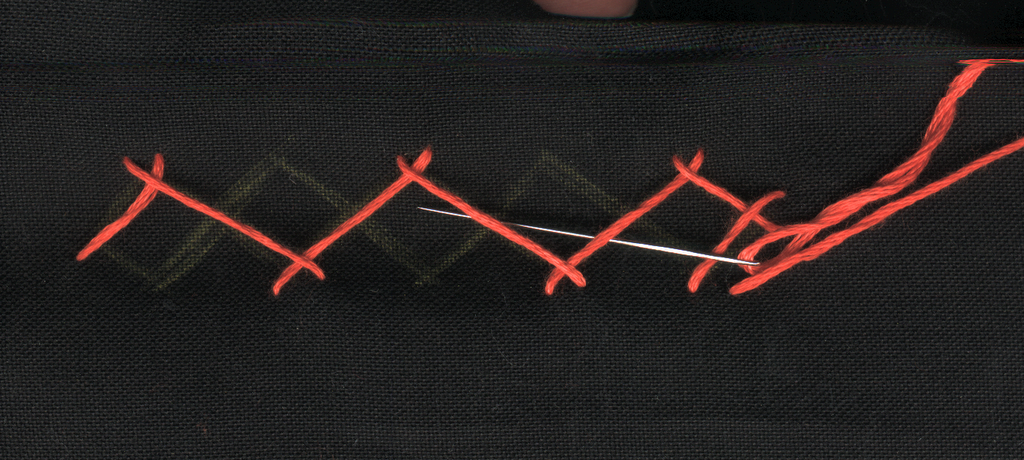
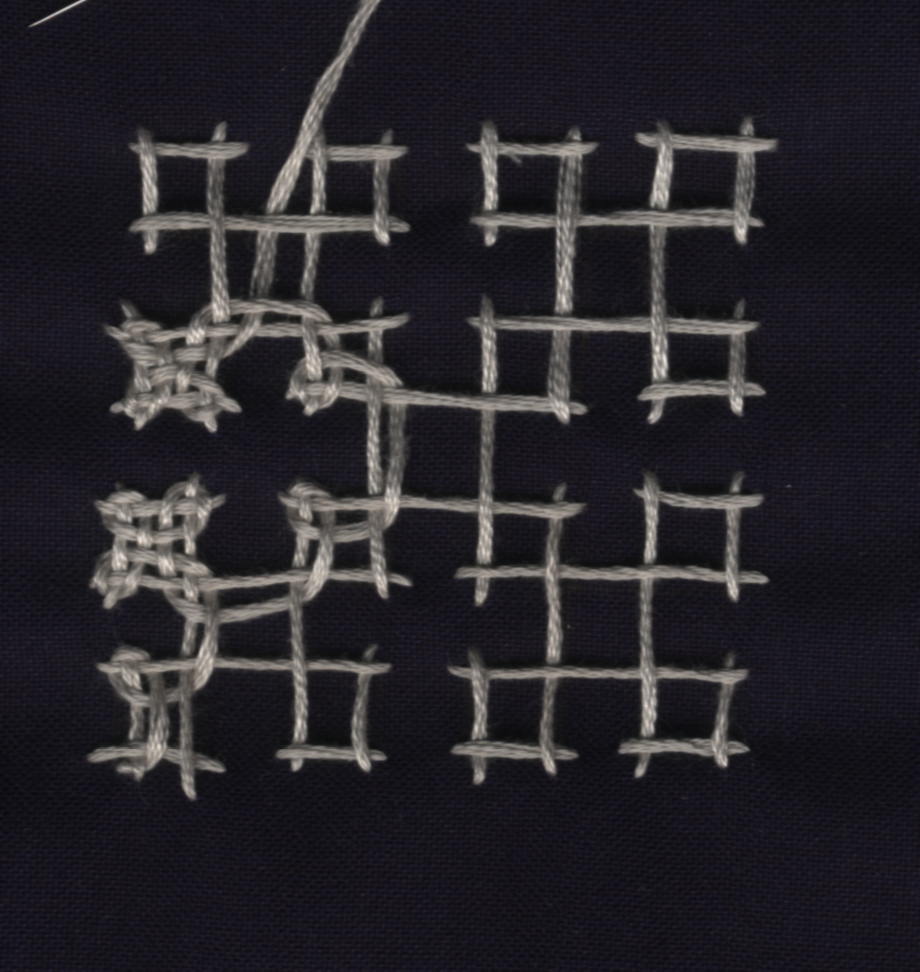
Note: I've used 6 strands of Anchor Stranded cotton for both the skeleton and the interlacing. I normally use a tapestry needle for the interlacing. The reason? When you use an ordinary sewing needle, chances of your needle snagging the yarn and pulling at the already laid skeleton are high. This results in a shabby finish. By using a tapestry needle, you eliminate this problem.
The Interlacing can be worked in 2 ways. The way I've done it for this kurta, and a 2nd method which produces a totally different effect.


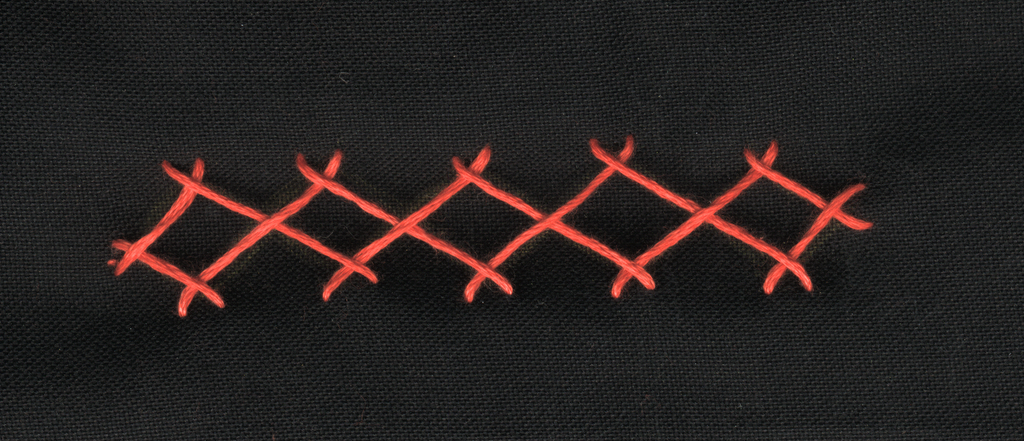
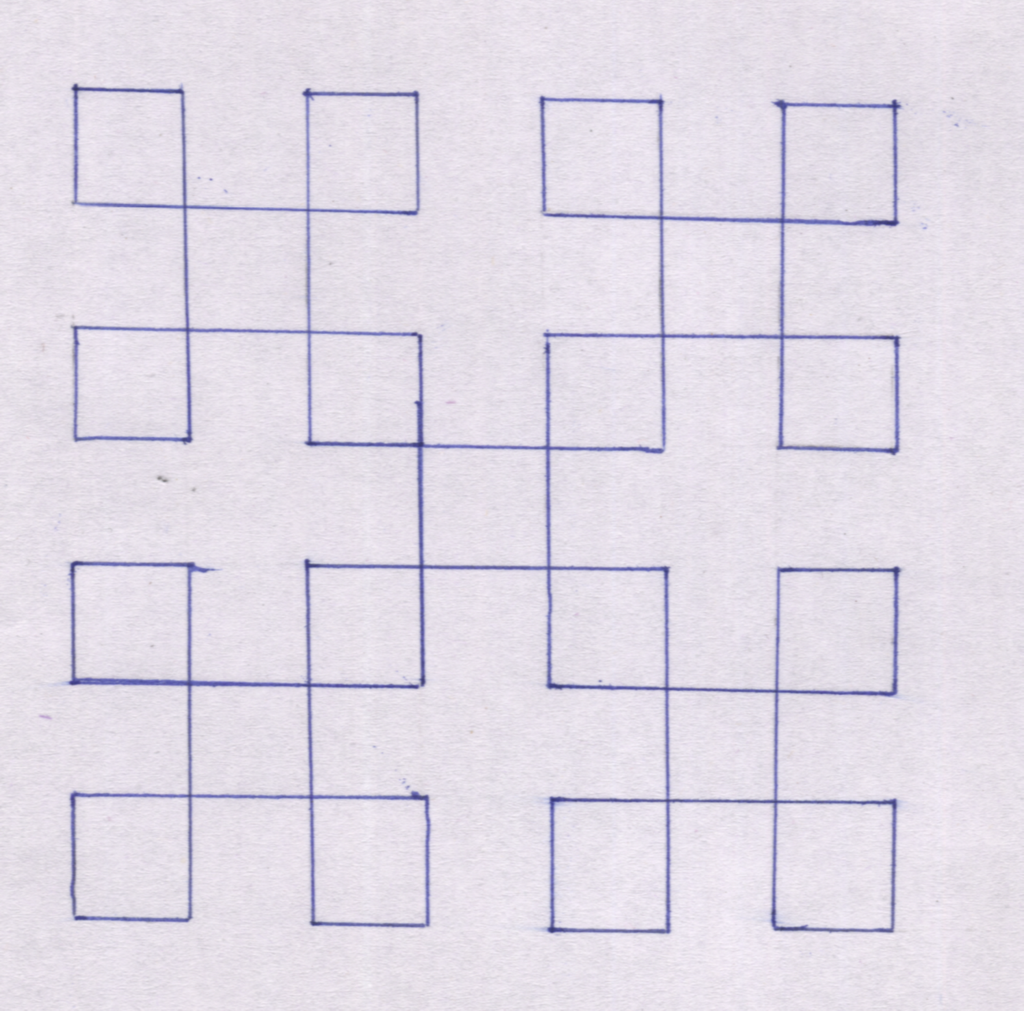
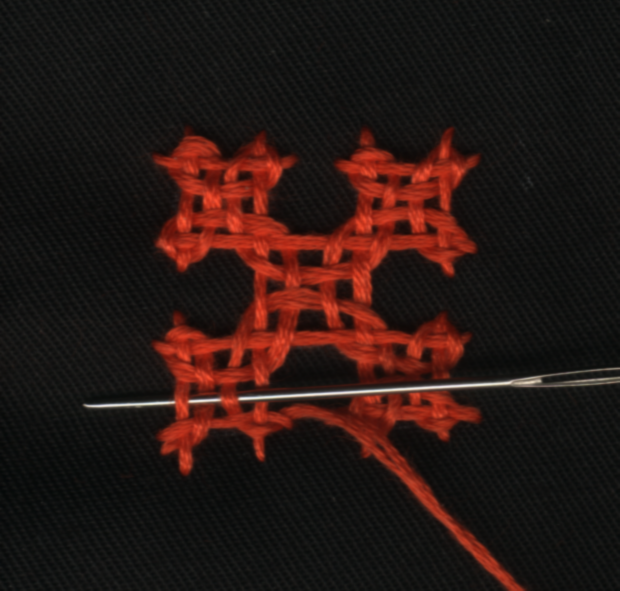
Design on Kurta Part I

Which method you choose depends on your personal preference. I personally prefer Method II for 2 reasons.
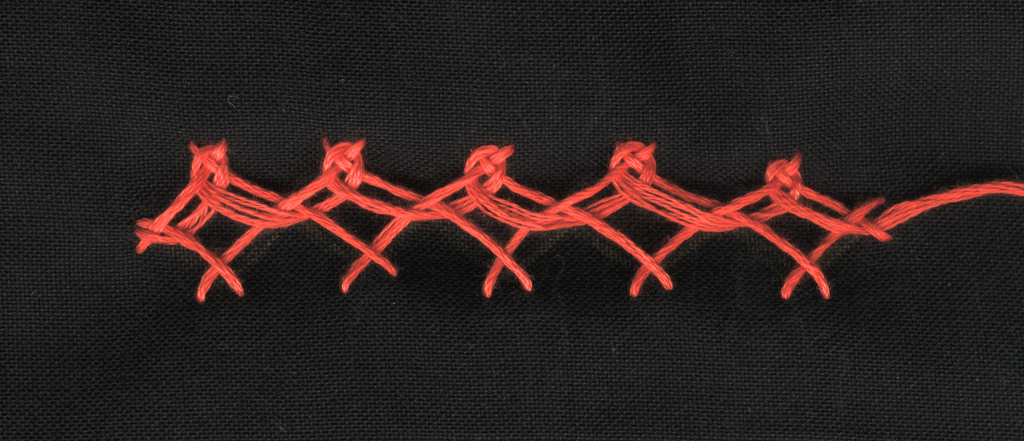
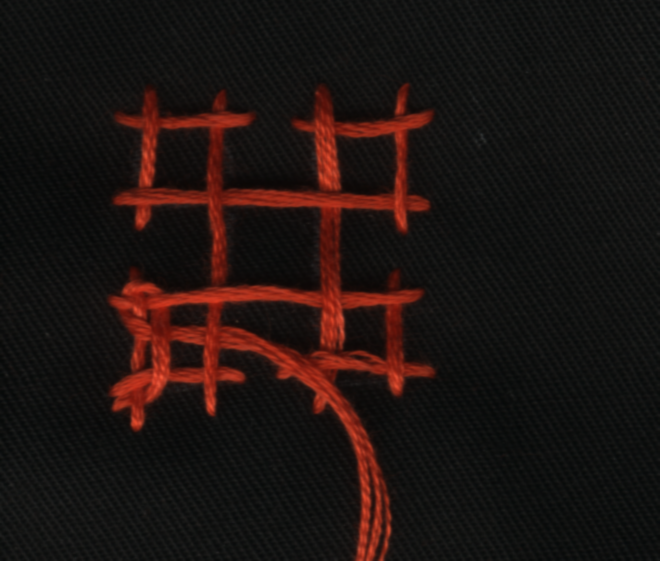
Here Method I looks more attractive than Method II, mostly because, I've used different colors for working the skeleton and the interlacing. That you can clearly distinguish between the skeleton and the interlacing, adds an element of interest to the design.
1. It does not deviate from the normal rules of Kutchwork and is therefore, easier to remember.
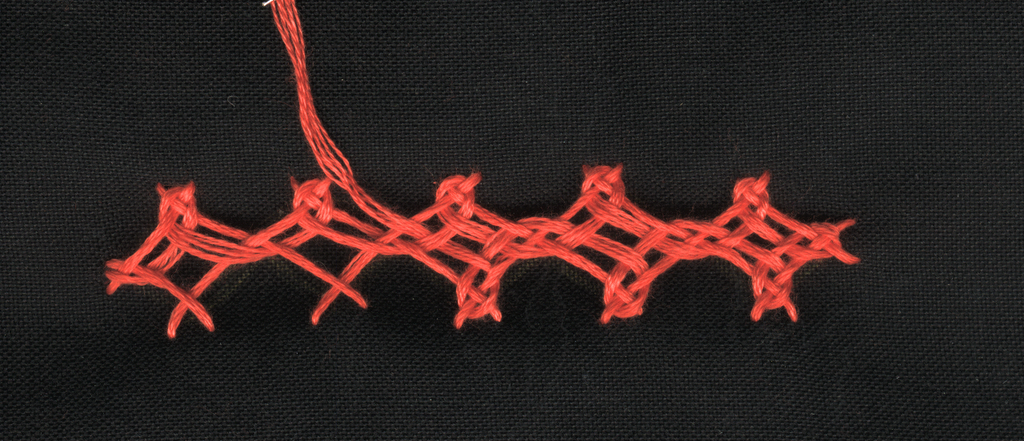
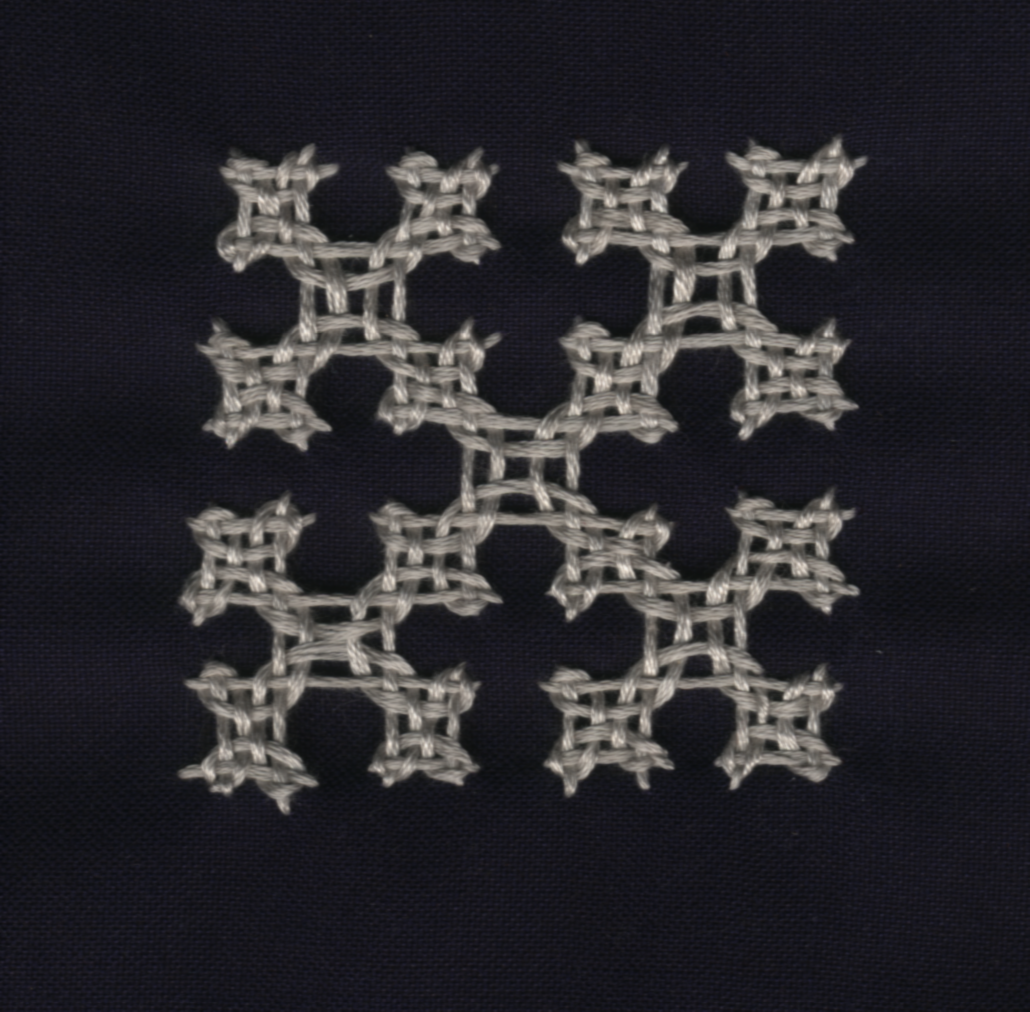
2. Method II looks more like Kutchwork than Method I.
Here Method I looks more attractive than Method II, mostly because, I've used different colors for working the skeleton and the interlacing. That you can clearly distinguish between the skeleton and the interlacing, adds an element of interest to the design.
I'd choose Method I if I am working with 2 colours and Method II if I am working with a single colour.
Use 2-3 strands if you are working on silk or very fine material.
All 6 strands, if you are working the design on a cushion cover - you want the design to stand out and draw the attention of anyone who enters the room.
4 strands work just as well as 6. But in my experience, whenever I use 4 strands, I end up losing the remaining 2 strands. The result? A lot of wasted yarn.
I'll post the steps for each of these over the next 2 posts.
Design on Kurta Part II
Design on Kurta Part IV - Interlacing Method I
Design on Kurta Part V - Interlacing Method II


