The Double Maltese Cross - Foundation and Interlacing
As already mentioned, once you understand the basics, all others patterns are easy to execute. They are but combinations of the basic motifs.

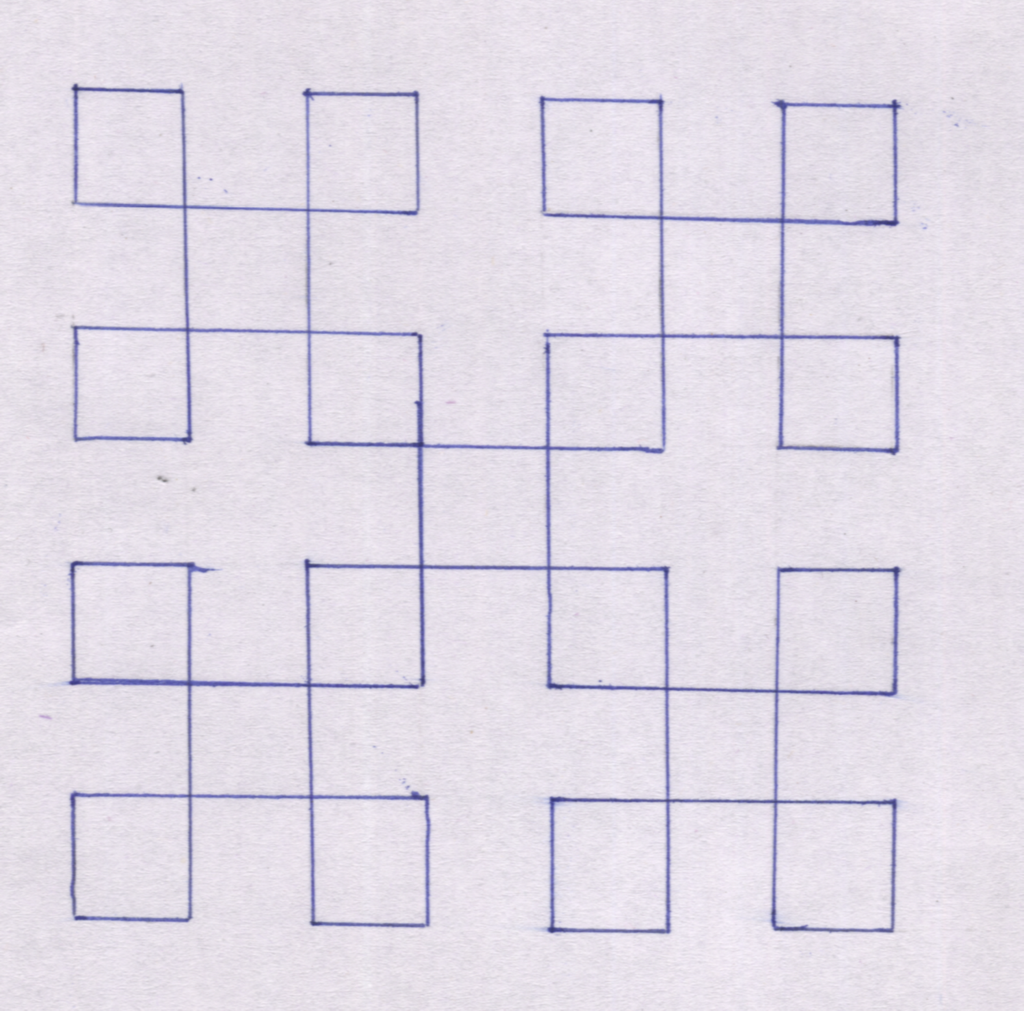
The sketch above is just a cluster of four Maltese Cross motifs linked together at the center by a Single Diamond.
For the sake of discussion,let us call this motif the Double Maltese Cross.
There is no need for step-by-step instructions for this motif.
So, how do you decide where to turn and where just to follow the lines?
We have already discussed corners and intersections in lesson II Part I.
Now here is what you do –
When you reach a corner – turn
When you reach an intersection – use it to reach the next square or in this case the next Maltese Cross


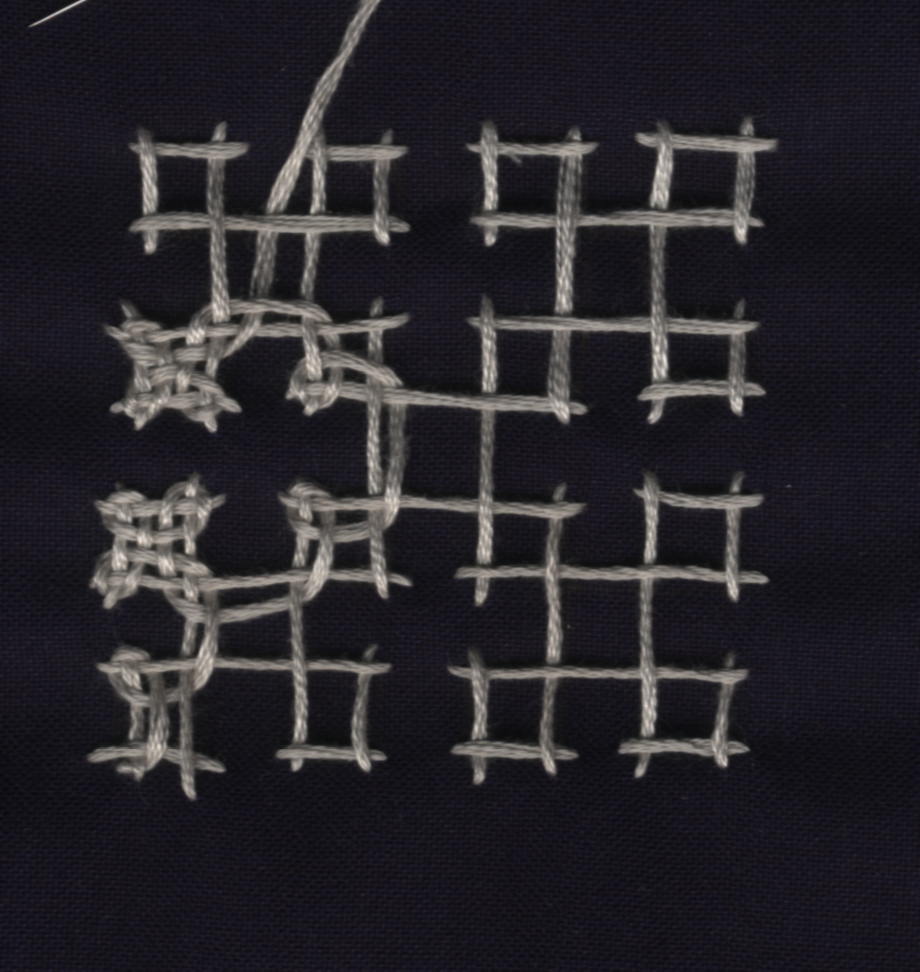
Now the filling or the interlacing –
When you reach a corner – go around it.
When you reach an intersection – turn and move on to the next square or in this case, the next Maltese Cross.


The pictures above show the starting and finishing of the Double Maltese Cross.
As already mentioned, once you understand the basics, all others patterns are easy to execute. They are but combinations of the basic motifs.
The sketch above is just a cluster of four Maltese Cross motifs linked together at the center by a Single Diamond.
For the sake of discussion,let us call this motif the Double Maltese Cross.
There is no need for step-by-step instructions for this motif.
So, how do you decide where to turn and where just to follow the lines?
We have already discussed corners and intersections in lesson II Part I.
Now here is what you do –
When you reach a corner – turn
When you reach an intersection – use it to reach the next square or in this case the next Maltese Cross


Now the filling or the interlacing –
When you reach a corner – go around it.
When you reach an intersection – turn and move on to the next square or in this case, the next Maltese Cross.
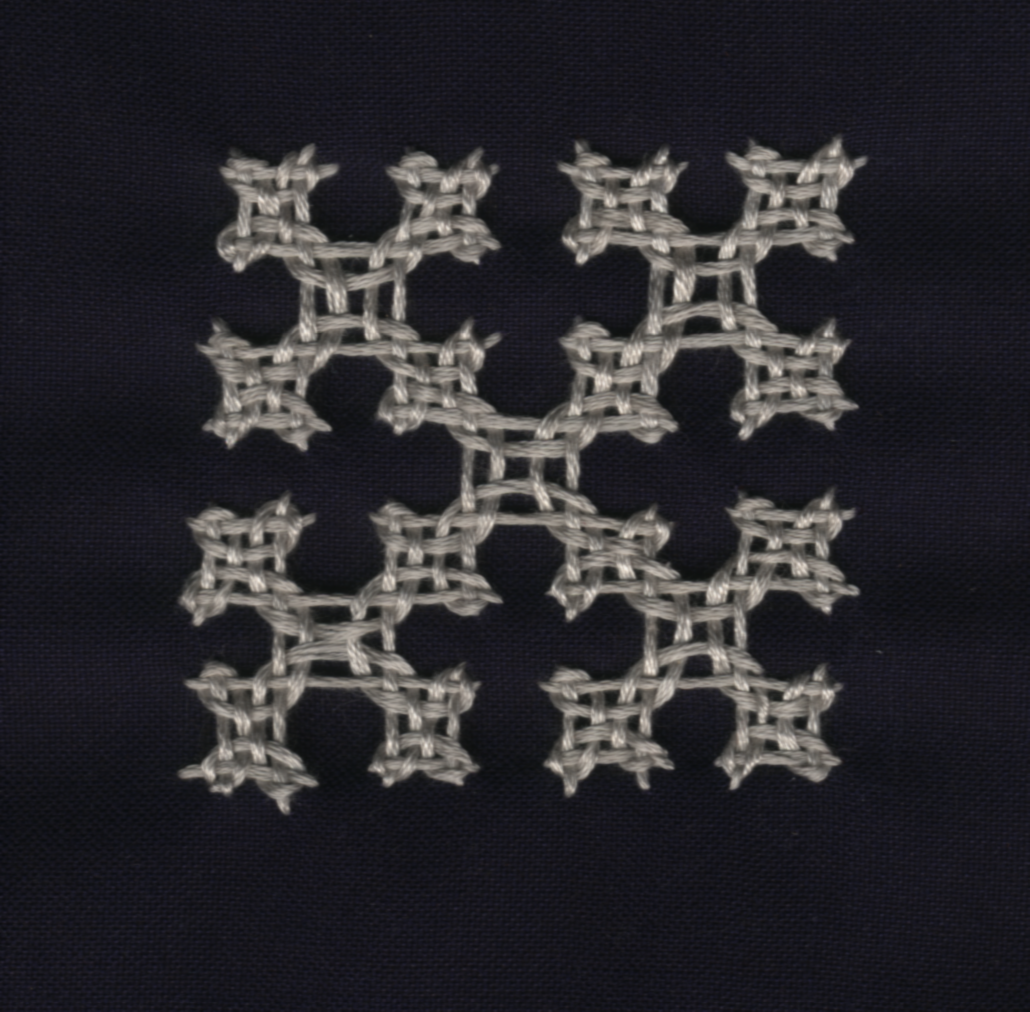
The pictures above show the starting and finishing of the Double Maltese Cross.
14 comments:
Thanks for these instruction - I would like to have a go but will need more energy than I have today. I did try the basic cross once before when I did a course with lessons on Indian embroidery.
I like this - it reminds me a lot of the same time of stitching you do on filet lace, only I like the fact that it's anchored on fabric - nice! The instructions are really easy to understand! Thank you!
Hi! I have enjoyed your sight so much. I was overjoyed to get the tutorials on kasuti and Kutch embroidery. I hope you post some more patterns in those categories. Thank you!
hi really gr8 work.
u have illustrated everything with gr8 care and paitence
hi Bhavani,
My name is shubha and i'm from Mangalore ,india.
i liked the way you illustrated.Infact i'm also learning some basic hand embroidery stitches from one of my friend.Are you interested in mirror work designs on cloth?please post some more works on kuch .
the instructions are very lucid. thanks. by the way, what do we do when the thread gets over? what is the good length of thread to take?
When the thread is about to get over, you weave at least a couple of inches of the thread through the back of the stitches and then cut.
A good length is about 20" or the length of your arm.
Dear Bhavani, Your instructions are easy to follow, is there any no. of counts when u r doing continuous running pattern? Pls clarify. Do u know badla if so can u help in this regard. Thanx
thank you for sharing.Is this also called cindy stitch?i have been searching for this for so many months.
its great and easy to learn from your blog,i have been waiting from years to learn kutch work.thanx rajini
hello,
i am a big fan of embroidery. i loved your tutorial. keep it up. please continue to post more tutorials.
Hi,
The tutorial is really great for a beginner like me!
could you please give a tutorial on phulkari as well???
Your tutorial was really very useful. I have followed it and it has come out well. Thanks for sharing this. Please visit my blog.
Hi Geetha,
glad you found the lesson useful.
Post a Comment