When I tried to save the lessons, I found, I could'nt. Some pictures could be saved and some could'nt be. It took me a while to find out what format when uploaded displayed the pictures in a saved file. I hope I have figured it out right.
The Maltese Cross – Laying the Foundation
This is a slightly more complicated than the basic diamond.
Transfer the pattern to fabric.

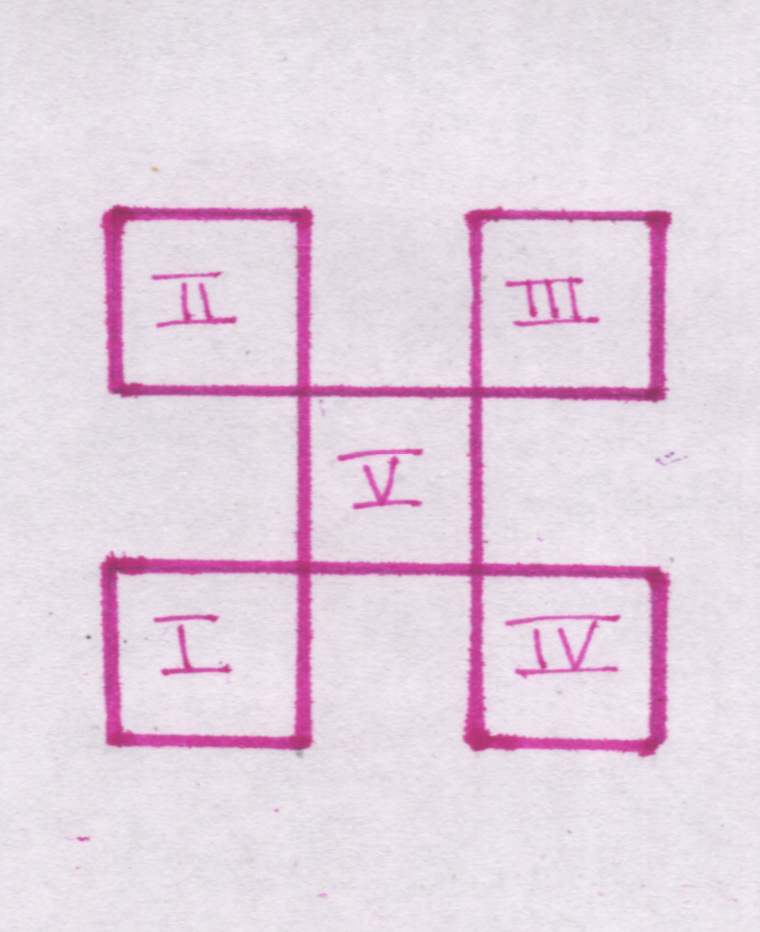
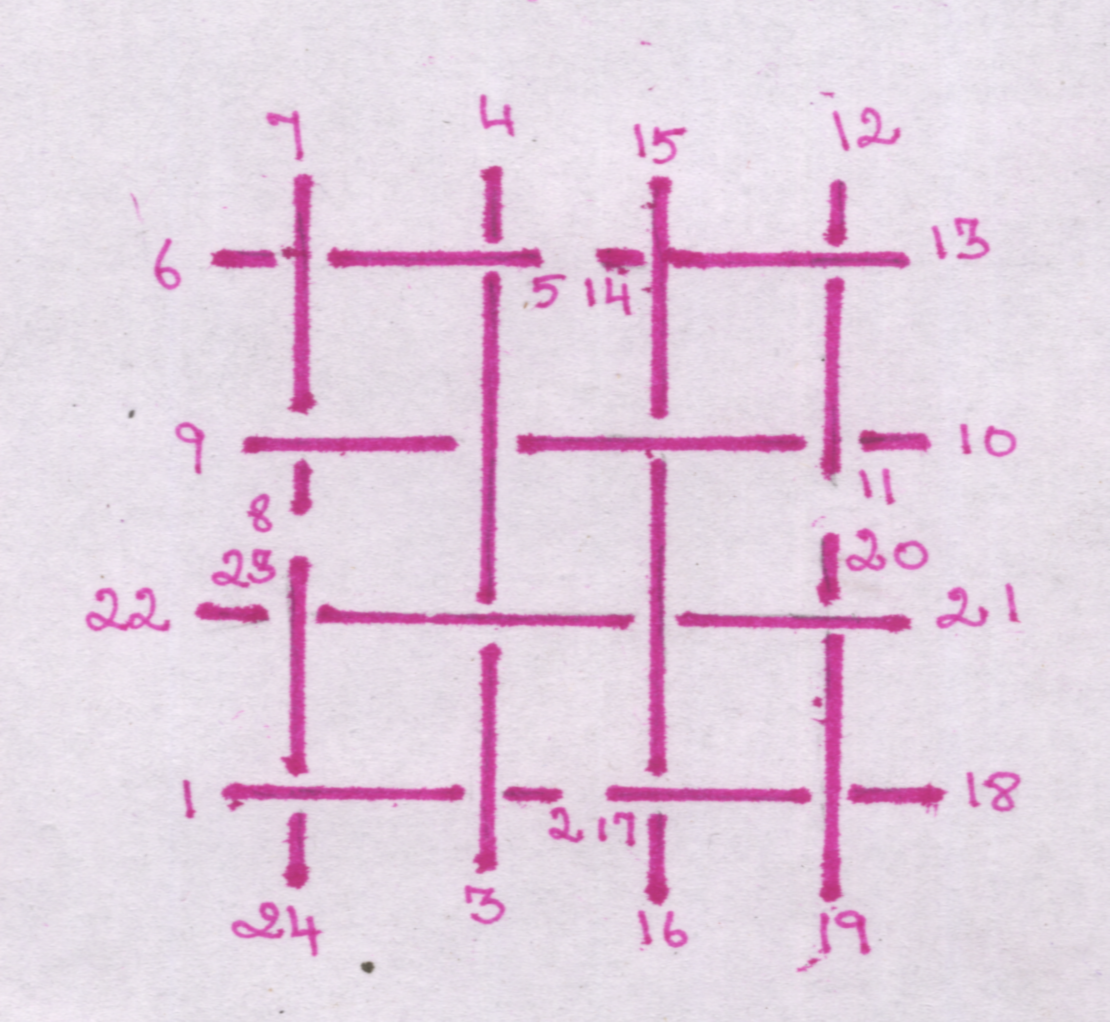
For the sake of discussion and understanding, we’ll name the squares I, II, III, IV and V.
We’ll refer to "L" as corners and "+" as Cross-overs or intersections.


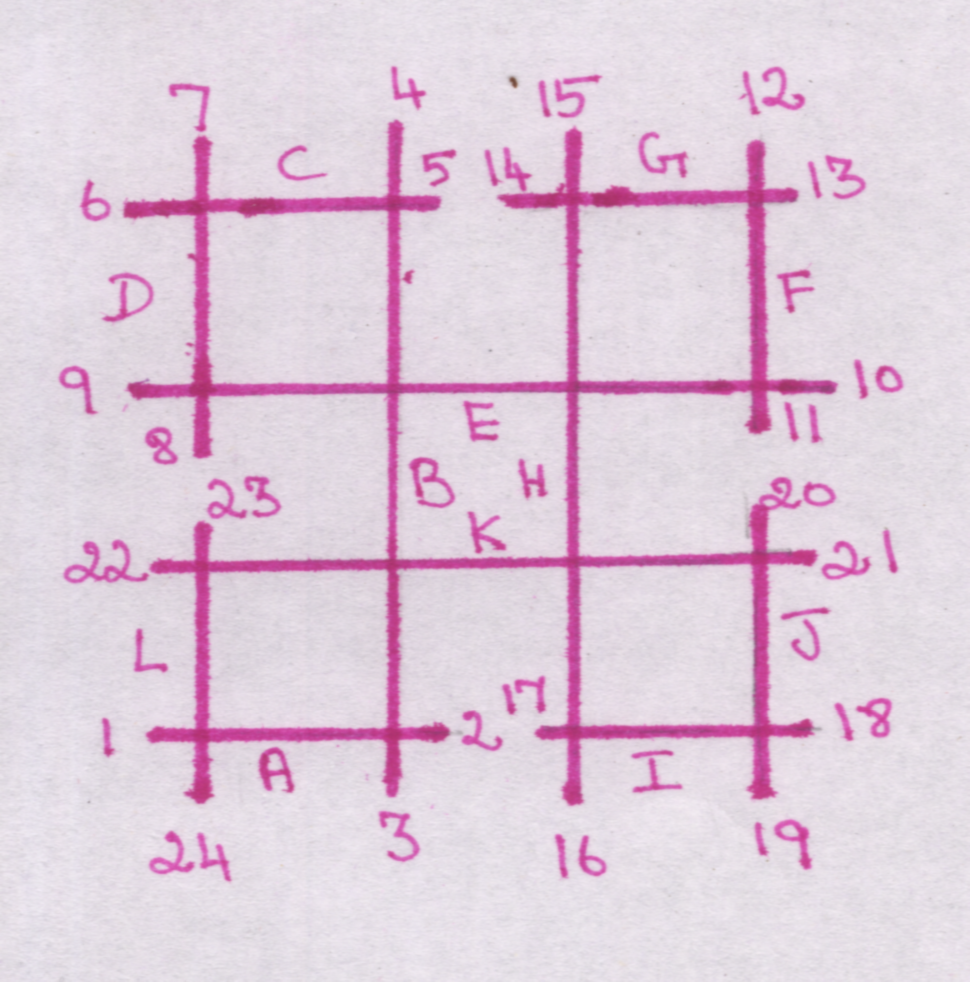
The lines,
1-2 = A
3-4 = B
5-6 = C
7-8 = D
9-10 = E
11-12 = F
13-14 = G
15-16 = H
17-18 = I
19-20 = J
21-22= K
23-24= L
The sketches are smudged. They looked good on paper. Scanning does highlight all the drawbacks.
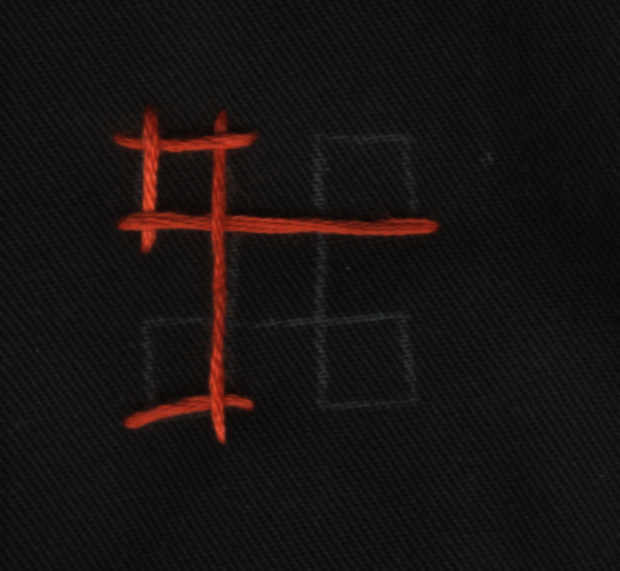
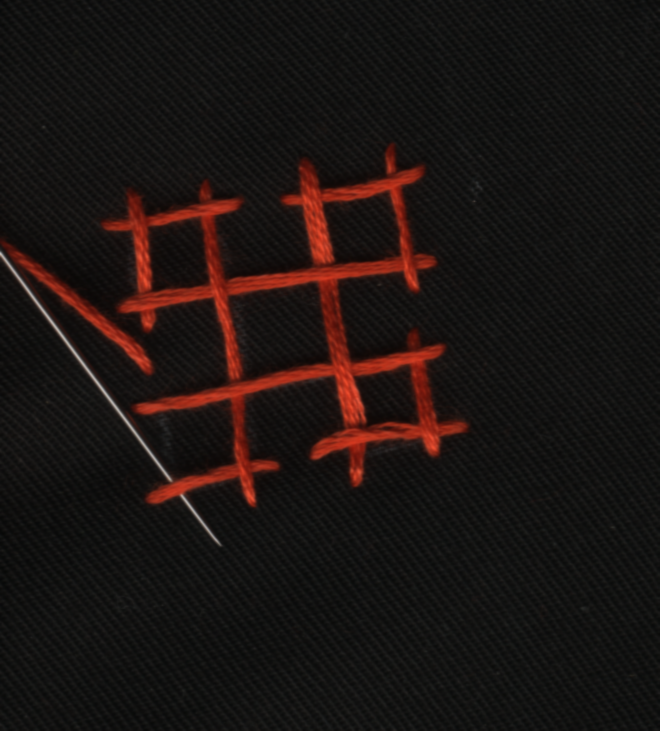
Letus now proceed with the embroidery.
Bring the needle
Up at 1,
down at 2 and up at 3 (corner)
We will now move from square I to square II through square V

down at 4 (line B over line A) and up at 5 (corner)
down at 6 (line C over line B)and up at 7 (corner)
down at 8 (line D over line C) and up at 9 (corner)
(line E over line D)
Pass the needle under line B Point to rem
down at 10 and up at 11 (corner)

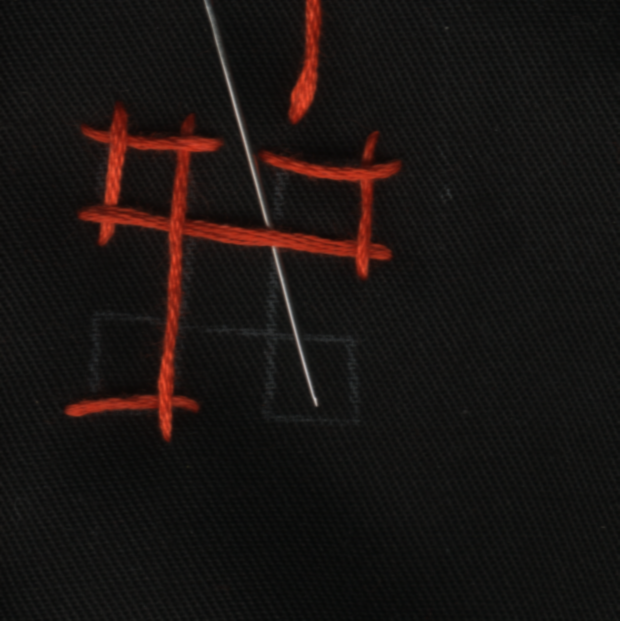
We move from square II to square III through square V
down at 12 (line F over line E) and up at 13 (corner)
down at 14 (line G over line F)and up at 15 (corner)
(line H over line G)
Pass the needle under line E
down at 16 and up at 17 (corner)

We will move from square III to Box IV through square V
down at 18(line I over line H) and up at19 (corner)
down at 20 (line J over line I)and up at 21 (corner)
(line H over line J)
Pass the needle under line H and over B

We move from square IV back to square I through square V
Down at 22 and up at 23 (corner)
Finishing

(line L over line K)
pass the needle under line A (line A over line L)
down at 24


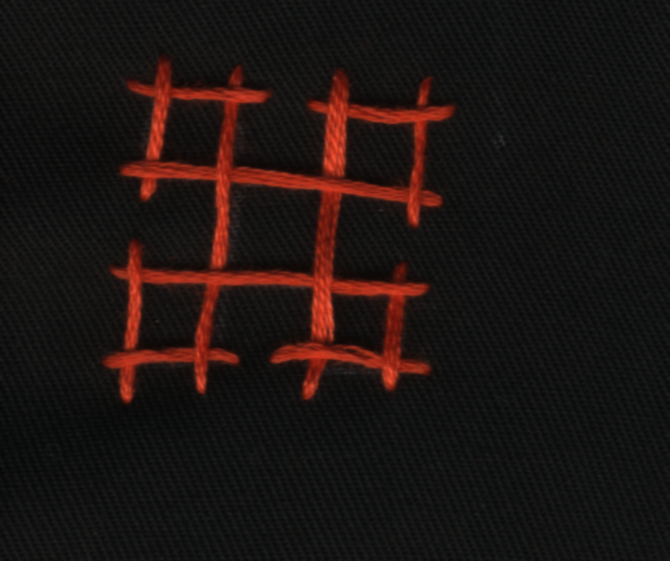
The skeleton or the foundation for the Maltese Cross is complete.
Once laying the foundation for the Maltese Cross is mastered, we are ready to move on to interlacing the foundation.
Points to remember:
1.The foundation starts at the lower left corner of square A and ends in the same place.
2.Square V is the junction we use to move from one square to the next.
3.Check that the criss-crossings at the intersections have been done correctly before moving on to filling.
Note:
1. While is alright to start the skeleton in any corner, to avoid confusion always start at the lower left corner.
2. If you are brave enough to start at any corner go right ahead just make sure you have understood the concept of the unders and overs.
The Maltese Cross – Laying the Foundation
This is a slightly more complicated than the basic diamond.
Transfer the pattern to fabric.
For the sake of discussion and understanding, we’ll name the squares I, II, III, IV and V.
We’ll refer to "L" as corners and "+" as Cross-overs or intersections.

The lines,
1-2 = A
3-4 = B
5-6 = C
7-8 = D
9-10 = E
11-12 = F
13-14 = G
15-16 = H
17-18 = I
19-20 = J
21-22= K
23-24= L
The sketches are smudged. They looked good on paper. Scanning does highlight all the drawbacks.
Letus now proceed with the embroidery.
Bring the needle
Up at 1,
down at 2 and up at 3 (corner)
We will now move from square I to square II through square V

down at 4 (line B over line A) and up at 5 (corner)
down at 6 (line C over line B)and up at 7 (corner)
down at 8 (line D over line C) and up at 9 (corner)
(line E over line D)
Pass the needle under line B Point to rem
down at 10 and up at 11 (corner)
We move from square II to square III through square V
down at 12 (line F over line E) and up at 13 (corner)
down at 14 (line G over line F)and up at 15 (corner)
(line H over line G)
Pass the needle under line E
down at 16 and up at 17 (corner)
We will move from square III to Box IV through square V
down at 18(line I over line H) and up at19 (corner)
down at 20 (line J over line I)and up at 21 (corner)
(line H over line J)
Pass the needle under line H and over B

We move from square IV back to square I through square V
Down at 22 and up at 23 (corner)
Finishing
(line L over line K)
pass the needle under line A (line A over line L)
down at 24
The skeleton or the foundation for the Maltese Cross is complete.
Once laying the foundation for the Maltese Cross is mastered, we are ready to move on to interlacing the foundation.
Points to remember:
1.The foundation starts at the lower left corner of square A and ends in the same place.
2.Square V is the junction we use to move from one square to the next.
3.Check that the criss-crossings at the intersections have been done correctly before moving on to filling.
Note:
1. While is alright to start the skeleton in any corner, to avoid confusion always start at the lower left corner.
2. If you are brave enough to start at any corner go right ahead just make sure you have understood the concept of the unders and overs.
11 comments:
i liked the work very much. It made a lot easier to understand. thanks.
An excellent display of the method to stitch. Will surely make one talented. Thanks
An excellent display. thanks. Would surely make world close to kutch.
cannot thank you enough for this information. had learnt a little of kutch some time back and had totally forgotten the 'unders' and overs. this has gotten me on track. thank you so much Bhavani
what should be the dimensions of the lines?
that's entirely upto you - should be based on
1. type/size/number of strands of thread you use.
2. what you want the finished work to look like.
Ideally, the interlacing should fill up the entire square - at the same time, you should'nt have to struggle to do the interlacing.
Thank you loads. Your instructions are super clear. I could learn only and only from your post.
Good to know Anuradha
Thank you so much ! Could you explain the next step, it's thé hardest for me !
Oh a big big and huge thk u for this tutorial. Since the time for such a clear tuto u have no idea. I'm from mauritius. Sending u loads of love and blessings
Thank you for your kinds words shamina
Post a Comment